
Imagine walking into a Dublin, CA area home that feels dull and lifeless because of stains on the walls. Whether it’s marks left by little hands, water damage, or just the wear and tear of everyday life, these imperfections can make a space look tired and uninviting.
But the good news is, a fresh coat of paint can work wonders! It can completely transform a room, making it feel new, clean, and vibrant. Painting doesn’t just cover up stains—it breathes new life into your home.
Understanding Different Types of Wall Stains
Walls can pick up all sorts of stains over time, and each type has its own story to tell. Let’s break down some of the most common culprits and how they find their way onto your walls:
1. Water stains
Ever noticed those unsightly yellowish or brownish spots on your walls or ceiling? Those are usually water stains. They happen when water leaks from pipes, the roof, or an upstairs bathroom. The moisture seeps into the drywall or plaster, leaving behind a discolored patch. Not only do these stains look bad, but they can also be a sign of a more significant issue, like a leak that needs fixing.
2. Smoke and soot
If you’ve ever burned candles, cooked a lot, or had a fireplace, you might see black or gray smudges on your walls. That’s smoke and soot buildup. These stains can cling to walls, especially in areas with poor ventilation. Over time, they can leave a sticky residue that’s tough to clean, making the room look dingy.
3. Grease and oil
Grease stains are common in the kitchen, especially near the stove or where you prep food. These spots come from cooking oils that splatter and cling to walls. Even in other parts of the house, touching walls with oily hands can leave marks. Grease stains are particularly tricky because they can seep into the paint and become more noticeable over time.
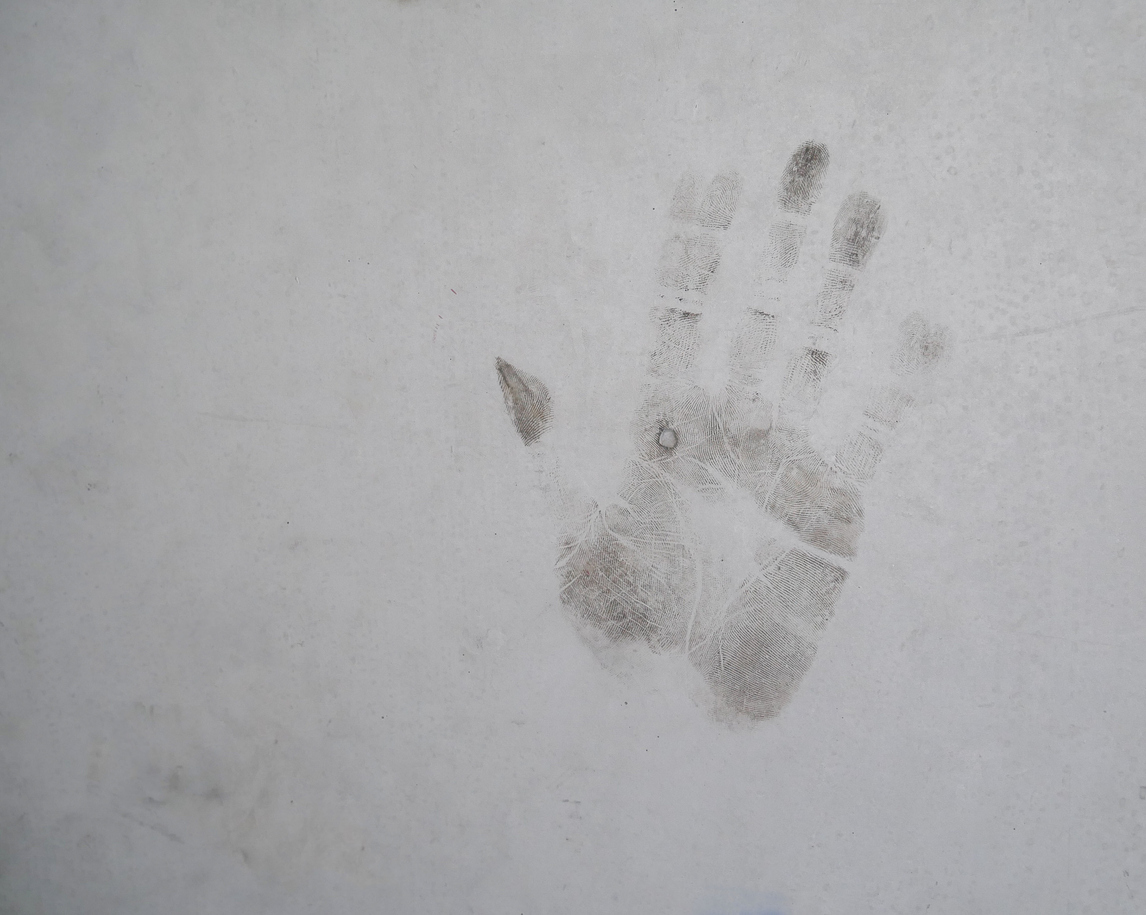
4. Crayon and marker
You’ve probably encountered these artistic expressions on your walls if you have kids. Crayons and marker stains are usually the result of little hands getting creative outside the lines of coloring books. While they’re often bright and colorful, they can be tough to remove without the right approach.
5. Mold and mildew
Mold and mildew are ugly and can also be a health concern. These stains typically appear in damp areas like bathrooms, basements, or where moisture lingers. They show up as black, green, or even white patches and are caused by fungal growth. Mold and mildew thrive in humid environments and can spread quickly if not addressed.
Choosing the Right Paint Finishes
Consider the different types of paint finishes to use when choosing paints to cover stains and other imperfections.
1. Flat finish
A flat finish has no shine and does not reflect light. It’s a popular choice for low-traffic areas like bedrooms and home offices because it gives a smooth, even look that can hide flaws. The lack of shine means it won’t highlight any bumps or stains on the surface.
However, flat finishes are not very durable and can be challenging to clean. If you scrub too hard, you might even rub off some of the paint. So, it’s best used in areas where the walls won’t get dirty too often.
2. Matte finish
Matte finishes are similar to flat finishes but with a subtle difference. They have a slight sheen that makes them a bit more resilient and easier to clean. This finish can still hide imperfections well, making it a good option for living rooms and dining rooms with moderate traffic. The slight sheen adds a touch of elegance without being too reflective, making the space feel cozy and warm. It’s a great middle ground if you want something that looks good and is a bit more practical than a flat finish.
3. Flat enamel
Flat enamel is the way to go if you’re looking for something more durable and easier to clean. Thanks to a thin film that forms on the surface, it combines the non-reflective qualities of a flat finish with a touch of durability. This finish is perfect for high-traffic areas like hallways, children’s rooms, and even kitchens and bathrooms. It’s more resistant to stains and can be wiped down without losing its look, making it ideal for spaces that see a lot of action.
The Importance of Surface Preparation
Before you get excited about picking the perfect paint color and finish, surface preparation is a crucial step you can’t skip. No matter how good your paints or coatings are, they will need help sticking to a dirty surface. The stains are likely to show through the new paint. To prevent that from happening, prepare the surface before painting.
Here are the steps to surface preparation:
1. Clean the walls
Cleaning the surface will at least make the stains less noticeable if not completely removed. Let us guide you on how to handle them:
General stains
Sometimes, walls just need a good cleaning to look fresh again. A simple mix of soap and water can do wonders for everyday grime or light stains. Use a soft cloth or sponge to scrub the walls gently. For a natural alternative, a solution of water and vinegar works well. If you need something a bit stronger, try using a cleaning eraser, which can easily remove scuffs and marks. Just make sure to rinse the walls with clean water afterward and let them dry completely.
Oil and grease
Kitchens can be a hotspot for grease stains. To tackle these, start with dishwashing soap, which is great at cutting through grease. Mix it with warm water and gently scrub the area. For more challenging spots, you might need a specialized cleaner designed for walls. Always test a small area first to ensure it doesn’t damage the paint. Removing grease thoroughly is crucial; otherwise, the new paint might not stick properly.
Crayon and marker
If your kids have turned your walls into a canvas, don’t worry—there are ways to clean up their masterpieces. For crayon marks, WD-40 can be surprisingly effective. Just spray a little on the stain and wipe it off with a cloth. Try using a regular pencil eraser or a gum eraser for pencil or pen marks. These can gently lift the marks without damaging the paint underneath.
Mold and mildew
Mold and mildew are not just eyesores; they can be health hazards. You’ll need specialized mold removers available at most hardware stores to remove them. Alternatively, a bleach solution can work well—just mix one part bleach with three parts water. Apply the solution to the affected area, let it sit for a while, then scrub and rinse thoroughly. Always wear gloves and ensure the room is well-ventilated when dealing with mold and mildew.
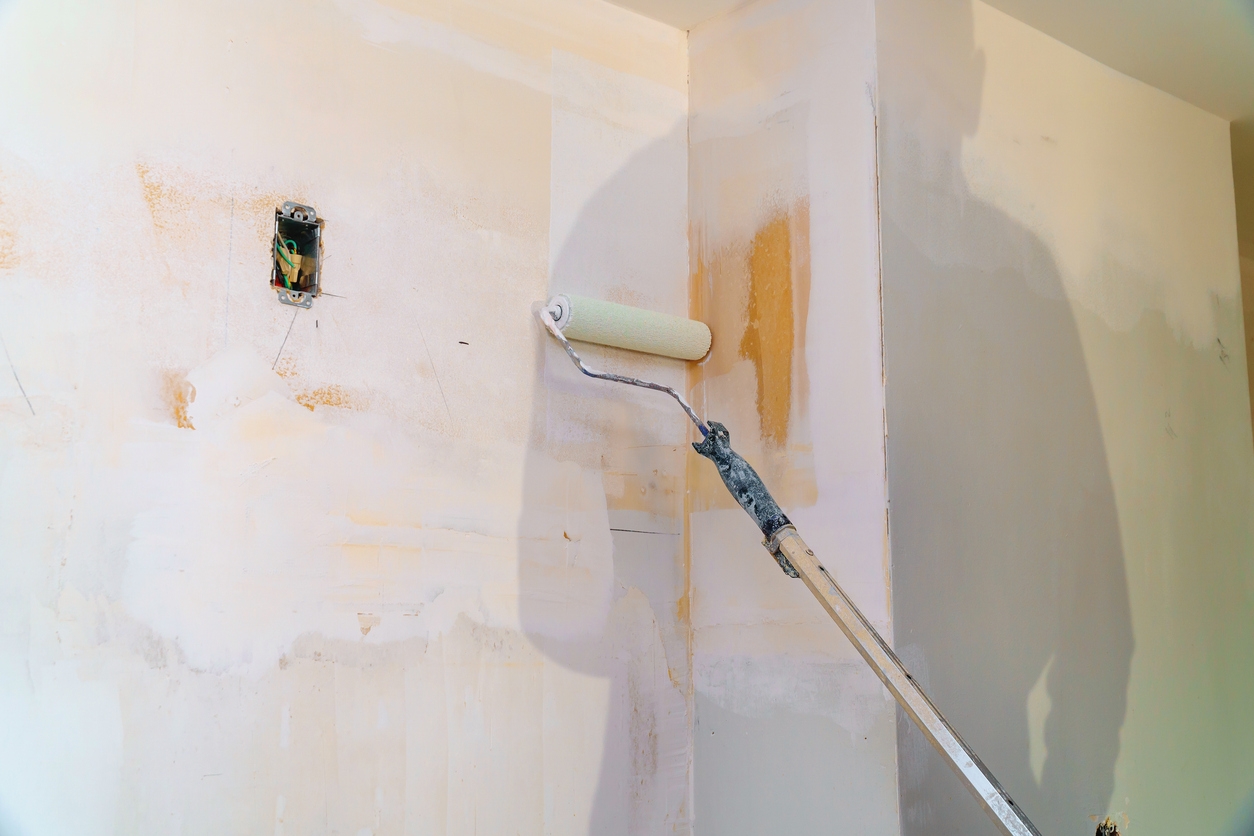
2. Repair and prime the surface
Once your walls are clean, it’s time to repair imperfections and prime the surface for painting.
Fill and sand imperfections
Walls often have small holes, cracks, or dents that need attention. Start by filling these imperfections with spackle or a joint compound. Use a putty knife to apply the filler, smoothing it out to blend with the wall surface. Once the filler is dry, sand the area lightly to create a smooth finish. Sanding also helps the new paint adhere better. If you’re dealing with larger cracks, consider using fiberglass mesh tape for added support before applying the filler.
Apply stain-blocking primer
Now that your walls are smooth and clean, it’s time to prime. A stain-blocking primer is your best friend when it comes to covering up stubborn stains and preventing them from bleeding through the new paint. There are different types of primers—water-based, oil-based, and shellac-based. Water-based primers are great for general use and are easy to clean up. Oil-based primers are excellent for covering water stains and providing a solid base, while shellac-based primers offer the best stain-blocking properties for tough stains like smoke or severe water damage.
When choosing a primer, consider the type of stain and the surface you’re painting. Apply the primer evenly and let it dry completely before moving on to painting. In some cases, you might need a second coat to ensure full coverage and stain protection.
Painting Process
Now that your walls are prepped and ready, it’s time to get to the fun part—painting! But before you dip your brush into the paint can, it’s essential to know a few key steps that will make your paint job look professional and last for years. Here’s a simple guide to help you achieve a beautiful, long-lasting finish that covers up the unsightly stains.
1. Choose high-quality paints
Choosing the right paint is crucial for a great result. High-quality paints have several features that set them apart:
- Coverage: Good-quality paints offer excellent coverage, meaning you’ll need fewer coats to achieve a rich, even color. This not only saves time but also ensures a more uniform finish.
- Durability: Look for paints that are known for their durability. These paints resist fading, chipping, and peeling, keeping your walls looking fresh for longer. Durable paints are essential in high-traffic areas where walls are more likely to get bumped or scuffed.
2. Use proper techniques for effective paint application
Once you’ve got your paint, it’s all about how you apply it. Here are some techniques to get a smooth, professional-looking finish:
Perform some cutting-in and rolling techniques
Start by “cutting in,” which means using a brush to paint along the edges where the walls meet the ceiling, baseboards, and corners. This technique helps create a clean line and makes it easier to roll paint in larger areas without worrying about getting too close to the edges.
After cutting in, use a roller for the main wall areas. The key is to apply the paint in a “W” or “M” shape, then fill it in without lifting the roller. This helps distribute the paint evenly and avoids streaks or roller marks. Be sure to use a roller with the appropriate nap (thickness) for your wall texture.
Layer for even coverage and durability
For the best results, plan on applying at least two coats of paint. The first coat may not cover completely but provides a base layer. Let it dry fully before applying the second coat. This second layer will deepen the color and ensure an even finish, covering any spots you may have missed the first time. For particularly bold colors or covering darker shades, a third coat might be necessary.
3. Consider paint needs for different rooms
Different rooms in your home have different needs, so it’s important to consider them when painting:
- Kitchens: Kitchens are high-traffic areas that often deal with grease and moisture. Choose a durable, washable paint finish, like satin or semi-gloss, which can withstand frequent cleaning. These finishes are also less likely to absorb cooking odors and can resist stains better than matte or flat finishes.
- Bathrooms: Bathrooms are another area with high moisture levels. A mildew-resistant paint is a good choice here. Semi-gloss or gloss finishes are ideal because they’re moisture-resistant and easy to wipe down. These finishes also add a bit of shine, which can brighten up the room.
- Living Areas: You have more flexibility in choosing finishes for living rooms and bedrooms. A matte or eggshell finish can create a soft, cozy feel, while a satin finish adds a touch of elegance. Consider the level of activity in the room—if it’s a space where walls might get dirty or scuffed, a more durable finish like satin can be practical.
Alternatives to Painting
Sometimes, you can’t cover stains completely, no matter how hard you try. In this case, you may need to opt for another wall treatment instead of applying multiple coats of paint. Here are the alternatives to paint:
1. Wallpaper
Wallpaper can be an excellent way to add personality and style to a room while effectively hiding stains and imperfections. There are a couple of types you can consider:
Traditional wallpaper
This type comes in a wide variety of patterns, colors, and textures. Whether you’re looking for a bold floral design, a classic stripe, or a subtle geometric pattern, traditional wallpaper has something for everyone. It’s a great choice if you want to make a statement or add a unique touch to your space. However, keep in mind that installing traditional wallpaper can be a bit tricky, mainly if you’re covering stains. It’s essential to make sure the wall surface is clean and smooth so that the wallpaper adheres properly.
Paintable wallpaper
If you love the idea of wallpaper but also want the flexibility to choose your own color, paintable wallpaper is a fantastic option. This type of wallpaper has a textured surface you can paint over once installed. It’s perfect for adding texture to your walls while still allowing you to customize the color. Plus, it can be a great way to cover up stains and imperfections, as the texture helps to hide any unevenness. You can also remove wallpaper professionally as well
Wallpaper Installation Tips and Considerations
Preparation is key when installing wallpaper. Start by cleaning the walls thoroughly to remove dirt or grease. If the walls are damaged or have holes, patch these areas first and sand them smooth. Applying a primer is also a good idea, especially if you’re using a lighter wallpaper over a darker wall color.
When applying the wallpaper, measure carefully and cut the pieces to fit your wall. Start at a corner and work your way around the room, making sure to smooth out any air bubbles as you go. For a seamless look, be meticulous with the seams, aligning the patterns carefully. If you’re not confident in your wallpapering skills, hiring a professional might be worth ensuring a flawless finish.
2. Wall Patching and Repairs
Sometimes, a simple patch can be the best solution for a stained or damaged area, especially if the rest of the wall is in good shape. Here’s a step-by-step guide to patching stained areas:
- Clean the area: Start by cleaning the stained or damaged area to remove any dirt or debris. This will help the patching material adhere better.
- Cut out the damaged area: If the stain is severe or the wall is damaged, cut out the affected section. Use a utility knife to cut a square or rectangular piece around the stain carefully.
- Attach a patch: For larger holes, cut a piece of drywall or plasterboard to fit the hole. Secure it to the wall using drywall screws or adhesive. For smaller holes or cracks, you can use a patching compound.
- Apply joint compound: Use a putty knife to apply a thin layer of joint compound over the patch, extending a few inches beyond the edges. Smooth it out as much as possible.
- Sand and repeat: Once the joint compound is dry, sand it smooth. You may need to apply additional layers of compound, sanding between each layer, to ensure the patch blends seamlessly with the rest of the wall.
- Prime and paint: After the final sanding, apply a coat of primer to the patched area. This helps seal the patch and provides a good base for the paint. Once the primer is dry, paint over the patch to match the rest of the wall.
Blending Patched Areas with Existing Walls
Blending a patched area with the rest of the wall can be a bit tricky, but it’s essential for a seamless finish. If you’re painting over the patch, try to feather the paint slightly beyond the patched area to blend it with the existing wall color. For textured walls, you may need to recreate the texture over the patch using a texturing spray or a brush.
If the patched area is still noticeable, consider repainting the entire wall or even the whole room for a consistent look. Remember, a well-done patch can make your walls look as good as new without the need for a full repaint or wallpaper job.
Conclusion
A fresh coat of paint can easily cover stains and rejuvenate your space. Whether you’re dealing with water stains, crayon marks, or just a wall that’s seen better days, the right paint and proper preparation can transform your room into something beautiful and inviting. We’ve covered the essentials to help you achieve a stunning and lasting result.
But remember, there’s a big difference between a DIY job and the work of a professional team. That’s where Custom Painting, Inc. comes in. With years of experience and a passion for quality, we take the stress out of home improvement.
Our team is friendly, professional, and dedicated to making your home look its best. Whether it’s a single room or a full home makeover, we’re here to help you achieve the flawless finish you’ve always dreamed of. Call Custom Painting, Inc. today at 925-294-8062 or complete the online form for a free consultation and estimate.
