

When painting doors and windows, protecting the glass is crucial to ensure a clean, professional finish. Unprotected glass can easily become splattered or smeared with paint, leading to unsightly stains that are difficult to remove. These paint marks not only ruin the appearance of the glass but can also require additional time and effort to clean, delaying the overall project. In this article, we will explore various methods that painters use to safeguard glass surfaces, preventing these common issues and achieving a flawless paint job.
Preparation Before Painting
Proper preparation is essential for protecting glass while painting doors and windows. This involves a few key steps to ensure the glass remains clean and undamaged throughout the painting process.
Cleaning the Glass Thoroughly
Before any painting begins, it is important to clean the glass surfaces thoroughly. Dirt, dust, and grease can interfere with the adhesion of protective materials and may even cause paint to spread onto the glass. To clean the glass:
- Use a glass cleaner or a mixture of water and mild soap.
- Wipe the glass with a lint-free cloth to remove all residues.
- Ensure the glass is completely dry before proceeding to the next step.
This step ensures that any protective coverings adhere properly and that the glass remains clear and pristine.
Checking for Any Existing Damage to the Glass
Inspecting the glass for any existing damage is another crucial part of the preparation process. Cracks, chips, or scratches can worsen during painting if not addressed beforehand. Here’s what to do:
- Examine the glass closely for any visible signs of damage.
- If any damage is found, decide whether it needs to be repaired or replaced before painting begins.
- Pay extra attention to the edges and corners, as these areas are more prone to damage.
By addressing any issues before painting, you can prevent further damage and ensure a smooth, professional finish. Proper preparation not only protects the glass but also sets the stage for a successful painting project.
Using Painter’s Tape
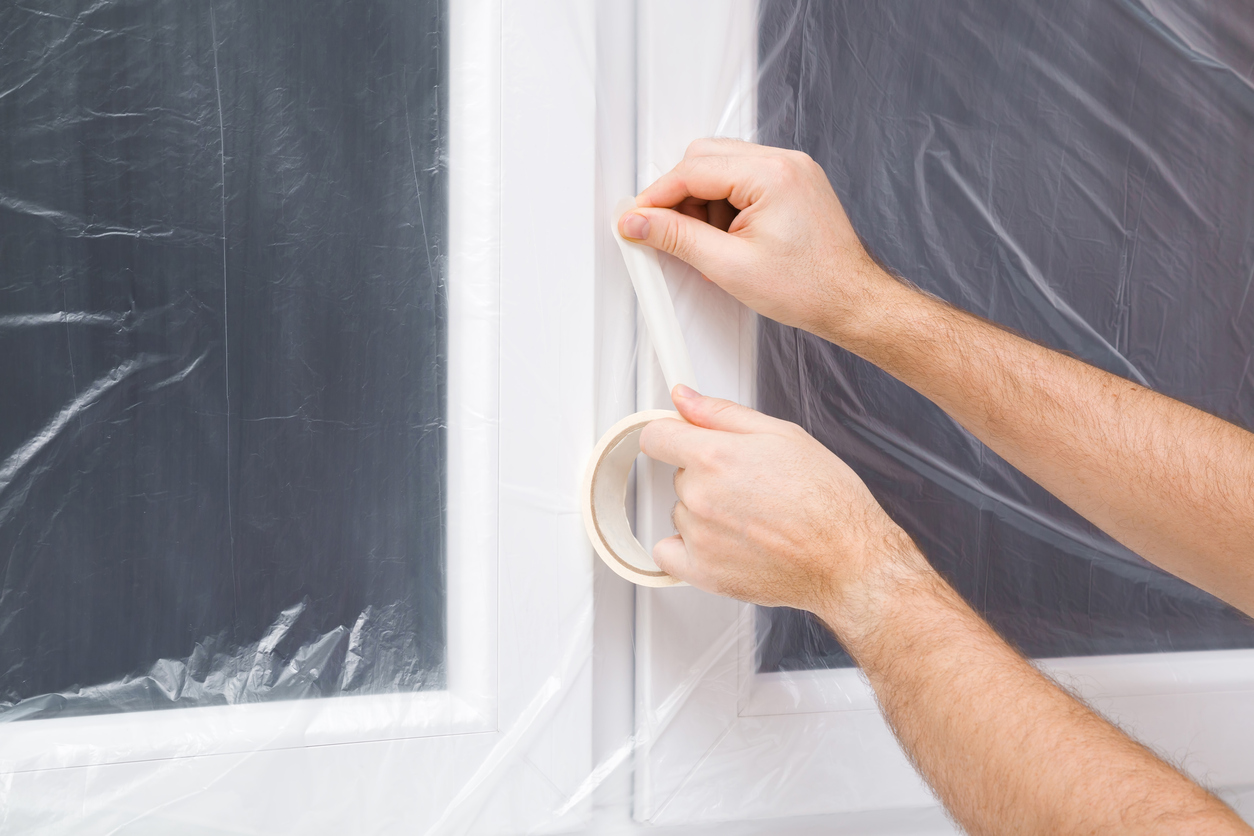
Painter’s tape is a widely used tool for protecting glass while painting doors and windows. It is specially designed to adhere to surfaces without leaving residue, making it highly effective in creating clean, sharp paint lines and preventing paint from reaching unwanted areas.
Explanation of Painter’s Tape and Its Effectiveness
Painter’s tape is a type of masking tape with a low-tack adhesive that is easy to remove without damaging surfaces. It is available in various widths and can be used on multiple surfaces, including glass. The effectiveness of painter’s tape lies in its ability to create a barrier between the glass and the paint, ensuring a neat and professional finish. It is ideal for:
- Creating straight lines along the edges of glass panes.
- Protecting glass from accidental paint splatters and drips.
- Ensuring clean edges for a polished appearance.
Step-by-Step Guide on Applying Painter’s Tape to Glass Edges
Applying painter’s tape correctly is essential to achieving the best results. Here is a step-by-step guide to help you:
- Clean the Glass: Ensure the glass is clean and dry before applying the tape.
- Choose the Right Width: Select a painter’s tape that is wide enough to cover the edges of the glass.
- Cut the Tape: Cut strips of painter’s tape slightly longer than the edges of the glass you want to protect.
- Apply the Tape: Start at one corner and carefully apply the tape along the edge of the glass. Press down firmly to ensure it adheres well.
- Smooth the Tape: Use a putty knife or a similar tool to smooth out any air bubbles and ensure the tape is flat against the glass.
- Overlap Corners: Overlap the tape at the corners to ensure complete coverage and prevent gaps.
Tips for Ensuring a Tight Seal to Prevent Paint Seepage
To prevent paint from seeping under the tape, it is crucial to create a tight seal. Here are some tips to help you achieve this:
- Press Firmly: Use your fingers or a tool to press the tape down firmly along the edges.
- Check for Gaps: Inspect the tape for any gaps or areas where it may not be adhering properly.
- Seal with a Putty Knife: Run a putty knife along the edges of the tape to ensure a secure bond.
- Avoid Stretching: Do not stretch the tape while applying it, as this can cause it to lift and allow paint to seep through.
- Double-Check: Recheck the tape after a few minutes to make sure it has not lifted or shifted.
By following these steps and tips, you can effectively use painter’s tape to protect glass surfaces, ensuring a clean and professional finish for your painting project.
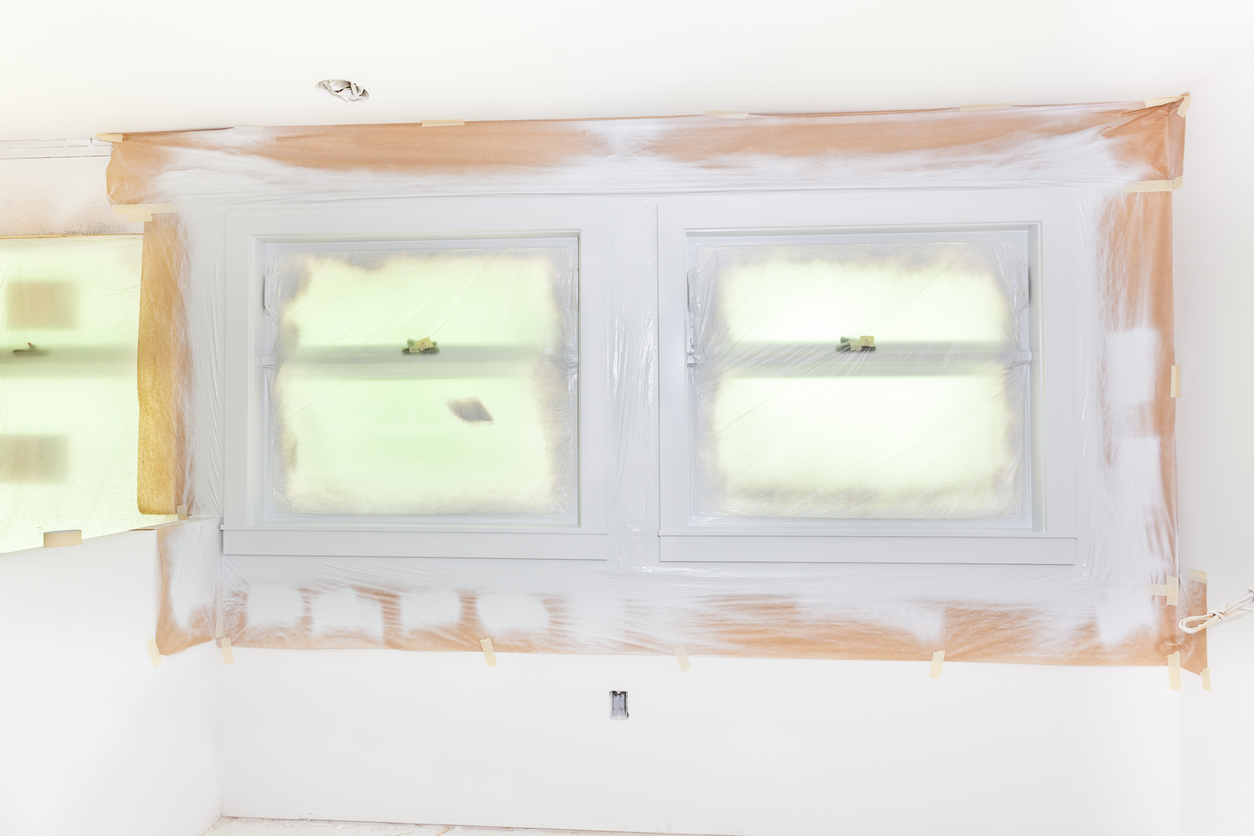
Applying Masking Film
Masking film is another excellent tool for protecting glass while painting doors and windows. It offers several advantages over traditional painter’s tape, especially when covering larger areas of glass.
Description of Masking Film and Its Advantages
Masking film is a thin, flexible plastic sheeting that clings to surfaces and can be easily cut to size. It is often used in conjunction with painter’s tape to cover and protect glass from paint splatters, drips, and overspray. The advantages of using masking film include:
- Large Coverage: Ideal for covering large glass surfaces quickly and efficiently.
- Cling Properties: The film clings to the glass, providing a secure and reliable barrier.
- Easy Removal: Removes cleanly without leaving any residue.
- Versatility: Can be used on various surfaces, not just glass.
How to Properly Cut and Apply Masking Film Over Glass
Applying masking film properly ensures maximum protection for your glass surfaces. Follow these steps for the best results:
- Clean the Glass: Make sure the glass is clean and dry to help the film adhere properly.
- Measure and Cut: Measure the dimensions of the glass and cut the masking film to size, leaving a few extra inches on each side for easy handling.
- Position the Film: Hold the film at the top corners and carefully position it over the glass.
- Secure with Tape: Use painter’s tape to secure the top edge of the film to the frame or surrounding surface.
- Smooth Down: Starting from the top, gently press the film onto the glass, smoothing it down as you go to avoid wrinkles.
- Trim Excess: Once the film is in place, trim any excess material using a sharp utility knife.
Tips for Achieving Smooth Coverage Without Air Bubbles
To ensure smooth and bubble-free application of masking film, follow these tips:
- Work Slowly: Take your time when applying the film to avoid wrinkles and bubbles.
- Use a Squeegee: A squeegee or a similar tool can help smooth out the film and remove air bubbles.
- Press Firmly: Press the film firmly against the glass, working from the center outwards to push out any trapped air.
- Overlap Slightly: If you need to use multiple pieces of film, overlap the edges slightly to ensure complete coverage and prevent gaps.
- Check Edges: Make sure the edges of the film are well-sealed with painter’s tape to prevent paint from seeping underneath.
By following these steps and tips, you can effectively apply masking film to protect glass surfaces during painting, ensuring a clean and professional finish.
Liquid Masking Solutions
Liquid masking solutions offer a versatile and effective method for protecting glass surfaces during painting projects. These solutions can be applied directly to the glass, creating a peelable film that safeguards against paint splatters and drips.
Introduction to Liquid Masking Solutions
Liquid masking solutions are specially formulated liquids that dry to form a protective, peelable film on glass surfaces. They provide several benefits over traditional masking methods:
- Easy Application: It can be brushed or sprayed onto the glass.
- Complete Coverage: Ensures an even coat, covering all nooks and crannies.
- Peelable Film: Once dry, the mask can be peeled off easily, taking any paint overspray with it.
- Versatile Use: Suitable for various surfaces beyond just glass, including metal and plastic.
How to Apply Liquid Mask on Glass Surfaces
Applying liquid masking solutions is a straightforward process, but it requires careful attention to detail to ensure effective coverage:
- Clean the Glass: As with other masking methods, start by cleaning the glass thoroughly to remove any dirt, grease, or dust.
- Choose the Right Product: Select a liquid mask appropriate for the type of paint you are using and the surface you are protecting.
- Application Tools: Use a brush for small areas and detailed work or a sprayer for larger surfaces.
- Apply Evenly: Apply a thin, even coat of the liquid mask over the glass, ensuring complete coverage. Avoid applying too thickly, as this can make peeling more difficult.
- Drying Time: Allow the liquid mask to dry completely. Drying times can vary based on the product and environmental conditions, so check the manufacturer’s instructions.
The Process of Peeling Off the Liquid Mask After Painting
Once the painting is complete and the paint is fully dry, removing the liquid mask is simple and efficient:
- Check Dryness: Ensure the paint is completely dry before attempting to remove the liquid mask. Premature removal can cause paint to smudge or peel.
- Start at an Edge: Use a fingernail or a small, blunt tool to lift the edge of the dried mask.
- Peel Slowly: Carefully peel the mask away from the glass, starting from one corner and working your way across. The mask should come off easily, bringing any overspray or paint drips with it.
- Dispose of Waste: Dispose of the peeled mask appropriately, as it may contain dried paint and other residues.
- Final Clean: Wipe the glass with a damp cloth to remove any remaining particles or adhesive residue.
By using liquid masking solutions, painters can achieve a clean, professional finish while protecting glass surfaces from paint damage. This method is especially useful for intricate or irregularly shaped areas where traditional masking methods might be less effective.
Protective Paper and Boards
Another practical approach for shielding glass surfaces during painting projects is to use paper or cardboard as a protective layer. These materials are readily available, cost-effective, and provide an excellent barrier against paint splatters and drips.
Using Paper or Cardboard as a Protective Layer
Protective paper and cardboard can be used to cover glass surfaces completely, ensuring that no paint reaches the glass. This method is particularly useful for larger areas or when working with heavy-duty projects. Here are some key points:
- Types of Materials: Brown kraft paper, newspaper, or cardboard sheets can all be used effectively.
- Coverage: These materials provide extensive coverage, making them ideal for protecting large glass panes.
- Cost-Effective: Paper and cardboard are inexpensive and easy to source.
Techniques for Securing These Materials in Place
Properly securing paper or cardboard to glass surfaces is essential to ensure they stay in place during painting. Here are some techniques:
- Cut to Size: Measure and cut the paper or cardboard to fit the glass area you need to protect, leaving a small margin for secure attachment.
- Tape Edges: Use painter’s tape to secure the edges of the paper or cardboard to the window or door frame. Ensure the tape is pressed down firmly to create a good seal.
- Overlap Edges: If using multiple pieces, overlap the edges slightly to ensure there are no gaps through which paint can seep.
- Double-Sided Tape: For added security, you can use double-sided tape to attach the paper or cardboard directly to the glass.
- Weight Down: If using cardboard, placing small weights at the corners can help keep it in place, especially in outdoor or drafty environments.
Situations Where This Method Is Most Effective
Using paper and cardboard as protective layers is most effective in specific situations, including:
- Large Glass Surfaces: Ideal for covering extensive glass areas such as patio doors or large windows.
- Heavy-Duty Projects: Suitable for projects involving spray paint or when working in environments where there is a lot of movement and potential for splatters.
- Temporary Protection: Effective for short-term projects where quick setup and removal are necessary.
- Outdoor Work: Particularly useful for outdoor painting jobs where wind might blow lighter protective materials away.
By employing paper or cardboard as protective layers, painters can achieve comprehensive coverage and protection for glass surfaces, ensuring a neat and professional finish while minimizing cleanup and damage.
Tips for Removing Paint from Glass
Accidental paint splatters on glass can be a common issue during painting projects. Removing these splatters effectively without damaging the glass requires the right methods, tools, and preventive measures.
Methods for Removing Accidental Paint Splatters
Several methods can be used to remove paint from glass, depending on the type of paint and how long it has been on the surface. Here are some effective techniques:
- Warm Water and Soap: For fresh paint splatters, a mixture of warm water and mild dish soap can often do the trick. Use a soft cloth or sponge to gently scrub the paint away.
- Razor Blade Scraper: For dried paint, a razor blade scraper can be very effective. Hold the blade at a 45-degree angle and carefully scrape the paint off the glass.
- Vinegar: Warm white vinegar can help loosen dried paint. Soak a cloth in warm vinegar, place it over the paint splatter for a few minutes, and then gently scrub.
- Commercial Cleaners: Specialized glass cleaners or paint removers can be used for stubborn paint. Ensure they are safe for glass and follow the product instructions.
Tools and Products That Are Safe to Use on Glass
Using the right tools and products is crucial to avoid damaging the glass while removing paint. Here are some recommended options:
- Razor Blade Scraper: Use a scraper with a clean, sharp blade. Replace the blade frequently to avoid scratches from dull edges.
- Plastic Scraper: A plastic scraper can be a safer alternative to a metal razor blade, reducing the risk of scratches.
- Non-Abrasive Sponges: Soft, non-abrasive sponges or cloths are ideal for scrubbing paint without scratching the glass.
- Glass Cleaner: A quality glass cleaner can help remove paint and residue, leaving the glass clear and streak-free.
- Mild Detergents: Mild dish soap mixed with water can effectively clean fresh paint splatters without harming the glass.
Preventive Measures to Avoid Scratches While Cleaning
To prevent scratches and damage while cleaning paint from glass, consider the following preventive measures:
- Test First: Test any cleaning product or method on a small, inconspicuous area of the glass first to ensure it doesn’t cause damage.
- Use the Right Angle: Always hold scrapers at a 45-degree angle to the glass to reduce the risk of scratching.
- Gentle Pressure: Apply gentle pressure when using scrapers or sponges to avoid scratching the glass surface.
- Keep Blades Sharp: Regularly change razor blades to ensure they remain sharp. Dull blades can cause scratches and uneven scraping.
- Clean Regularly: Frequently clean the glass with a soft, damp cloth during the paint removal process to remove debris and prevent scratching.
By using these methods, tools, and preventive measures, you can effectively remove paint from glass surfaces without causing damage, ensuring a clear and polished finish.
Conclusion
Protecting glass surfaces during painting projects is essential for achieving a clean, professional finish. Methods like painter’s tape, masking film, liquid masking solutions, and protective paper or boards can prevent paint splatters and ensure your glass remains pristine. If you do encounter accidental paint splatters, follow the recommended removal techniques to keep your glass scratch-free.
For more expert advice or assistance with your painting projects, contact Custom Painting, Inc. at 925-294-8062 or reach out through our contact form.
